

Don't find fault, find a remedy. Henry Ford
When Henry Ford watched the 15 millionth Model T Ford roll off the assembly line at his factory in Highland Park, Michigan, on 26 May 1927, he probably remembered fondly the first Tin Lizzy to come out of the factory in 1908. The look of that last one might have changed, but it was essentially the same world-famous Model T. Today, customers are different. We need the option to customise so that we know the product will satisfy our needs.
This is true even when it comes to marketing automation platforms. If you are using SharpSpring, we have something in common to talk about. We would like to welcome you to the first of our "SharpSpring Experts" series of blog posts, where we would share our solutions to how we managed to customise the platform to fit our needs, even if you are not "into the technical stuff".
Creating multiple forms on Sharpspring
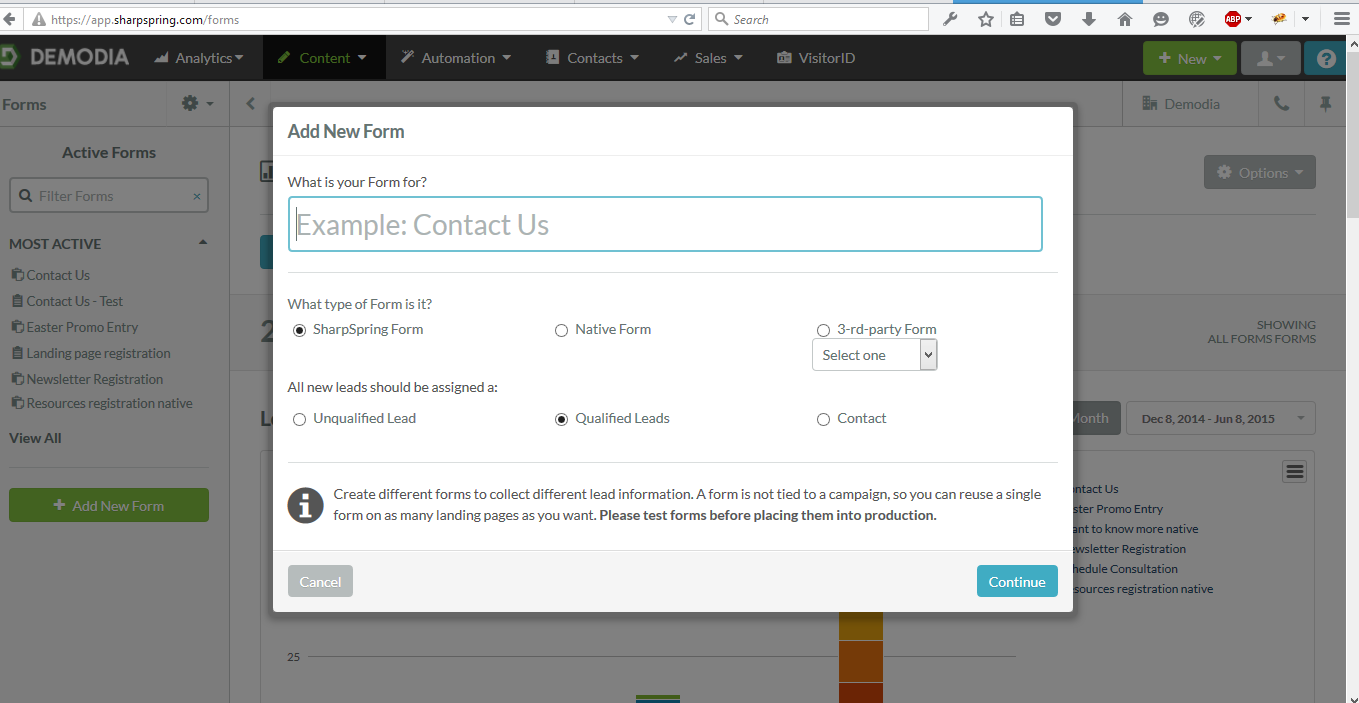
If you are using SharpSpring, you have probably tried to add more than one form at a time to a single webpage. As straightforward as it may seem, there are some tricky parts. For starters, you have to know how the different form types work and which one to choose. Who has the time to go through the video tutorial to figure out which form you need. ;-)
The standard way to create a SharpSpring form is within an iFrame (for the non-techies: it works like a window inside another window). If you do this then you will find that it's pretty much impossible to interact with the form inside the iFrame. This makes it impossible to add proper styling and make changes to it via external CSS, jQuery or anything else for that matter. There are ways to add a CSS to the form inside the iFrame, but given that you've already created a great website theme, I'm guessing that you don't really want to have to copy half of your CSS into SharpSpring.
Now let's talk about the Native Form. This is what people use when they want to easily style the form and validate it using an external form validation script. SharpSpring provides a really easy way to capture data by just adding a couple of short snippets of code to your existing web page. However, there’s the catch: your page can only contain one form otherwise the snippets just don't work.
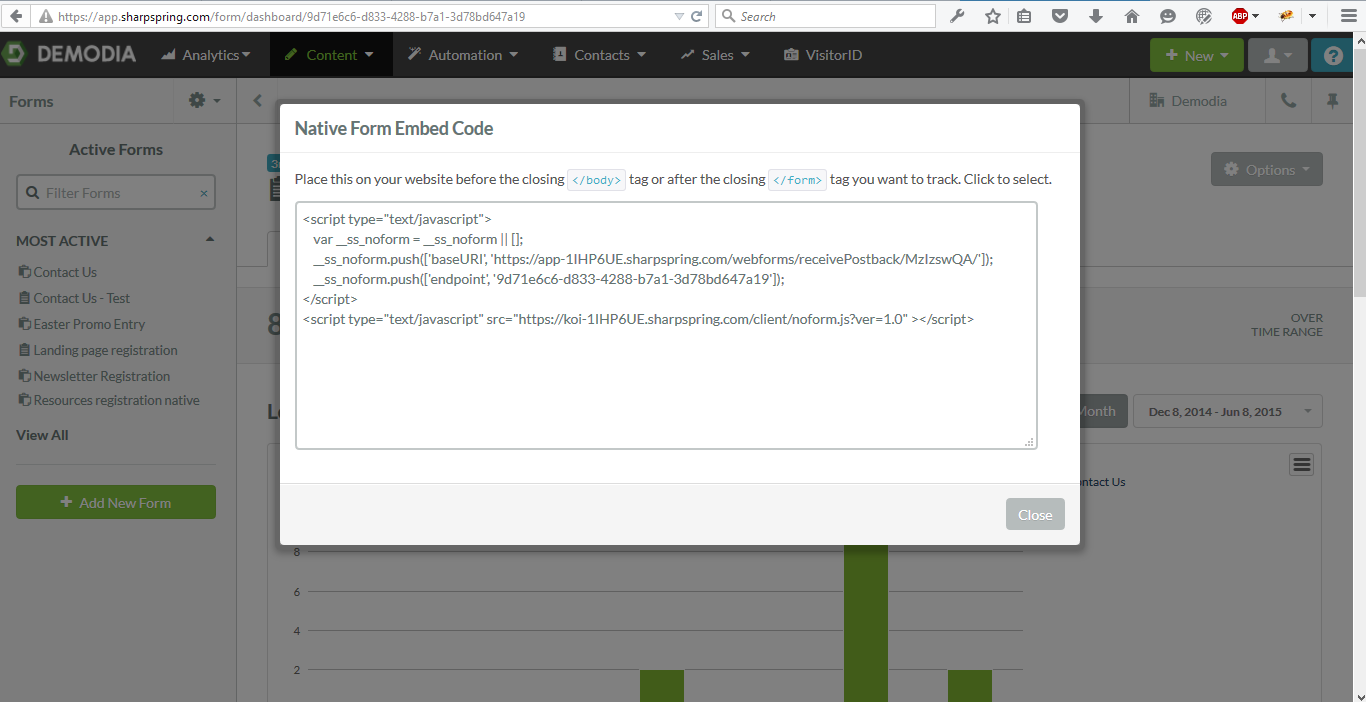
The way the default SharpSpring code snippets work is to capture the input from your Native Form and copy it into their __ss_noform variable which acts as a transporting tool into which additional parameters are pushed to produce a final submission URL. If you take a closer look at that variable you can see that it serializes the fields and the values from the Native Form you have created. Bear in mind that in order to map your fields to the SharpSpring fields you need to click on Form Fields to map your fields to the SharpSpring ones. This happens when you submit the form and click the refresh page.
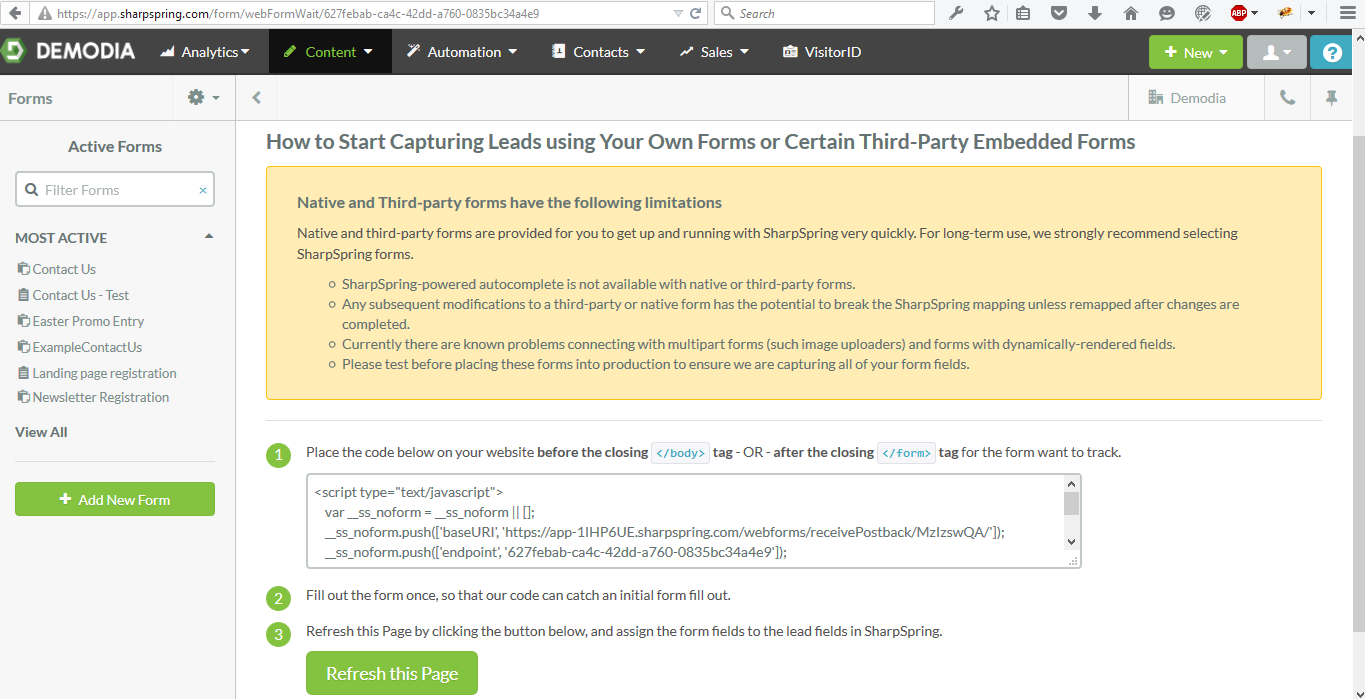
Note that the fields you’d like to map must have a “name” attribute to them since the POST method needs the fields to recognise these posting from the rest. So, how do you add multiple native forms into a single webpage with SharpSpring?
Here is where the AJAX functionality provided by jQuery comes to the rescue. Initially we need to create a jQuery selector to find all form "Submit" buttons. After that, we need to prevent their default action (submitting the form). With this in place we can intercept the submission event for each form and then serialise the form data. Finally, we post the collected data back into the SharpSpring postback URL.
The code should look something like this:
[raw]

$('#yourform').find('input[type=submit]').on('click', function(e){

  e.preventDefault();

  sharpspringCode = yourSharpSpringFormID

  urlparams = $('#yourform').serialize();

  $.ajax({

    url: 'https://app-abcdef.sharpspring.com/webforms/receivePostback/abc123/'+sharpspringCode+'/jsonp/?'+urlparams,

    contentType: "application/json",

    dataType: 'jsonp',

    success: function(json) {

      yourform.submit();

    },

    error: function(e) {

      $('#yourform').submit();

    }

  });

});

[/raw]
Your "yourSharpSpringFormID" can be found in the Native Form Embed Code under the following parameter of the __ss_noform - __ss_noform.push(['endpoint', '123febab-ca4c-42dd-a270-0835df34a4e9'], the '123febab-(...) being your code).
With this code you can run multiple forms on one page. Keep in mind that you will need to use a different SharpSpring Form ID for each form in order to submit them correctly.
One last thing to note is that if you ever make any changes to the form fields, you will need to reset the fields using the SharpSpring UI and resubmit the form again to remap the new fields.
Going back to Henry Ford, he told his his management team that in the future “Any customer can have a car painted any color that he wants - so long as it is black.” Fortunately, he is not in charge of SharpSpring and now you can have as many forms as you want in whatever color you want.
What other tips do you have for using SharpSpring? Join our LinkedIn group SharpSpring Experts to share your comments, questions, tips and favorite quotes.